Hello Outdoor School Students!
In light of our recent trip and the fact that the e-mail list on courselink doesn’t have everybody on it (since we’re separated into two sections), I decided to make a quick post about making your pictures bigger without making them all blurry. I know Diane said to stretch them, but that makes the quality horrible for some reason, even if your original picture was big and pretty before :O. So in case you didn’t know, there is an option to choose the size of your photo.

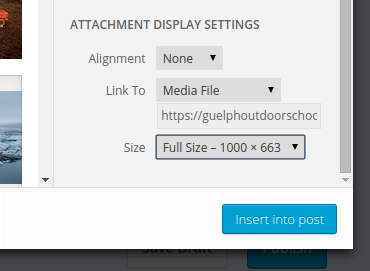
When adding media, it uploads it to a media library then you pick the photos you just uploaded, right? Well on the right side there are “attachment details” which may seem useless, I know, BUT, if you scroll down to the bottom of that little thing, you get options for the size! It usually picks thumbnail right off the bat for you, but if you just press Full Size, you should be able to get it as big as it will appear on the blog 🙂 Then you can just make it smaller if you like (or click the “small” or “medium” option)

Above is what you’re looking for, then just insert into post as usual 🙂 and it’s pretty!
Anyways, I will totally delete this post later, but I thought it might be helpful with all the beautiful photos that will be coming in from everyone on our trip! Okay, that is all 🙂
Peace out
– Andrea
Leave a Reply
You must be logged in to post a comment.